My 3 year old son Ben with his Teemo hat from PAX
ZaRambo Cosplay
Sunday, September 9, 2012
Wednesday, September 5, 2012
Friday, August 31, 2012
The Making of Mordekaiser
This is the first full body costume I have made. I have done some set
design, customizing and painting of miniature models, as well as various arts
and crafts but nothing like this. The following are some pictures I took while
figuring out how I would create Mordekaiser.
Next I made the chest piece. I did this by putting on 6
sweatshirts and a puffy coat then a trash bag with a head hole and arm holes. I
had my wife wrap me in a couple layers of masking tape then cut me out of it. I
taped that back up and stuffed the whole thing with balled up newspaper. At
this point it held its shape so I added a couple layers of paper-mache and
pulled out the stuffing. That is what you see in the picture below plus a piece
of foam rubber building up the middle of the chest.
The Helm started as a balloon covered in paper mache. I
eyeballed where the crown should be, drew a rough face and cut a line down the
middle opposite the crown. After that I cut the sides into 1" strips, flattened
them out and taped them together. that is what you see in the picture below.
I cut a block of wood
to reinforce the inside before I did any fiberglass work.
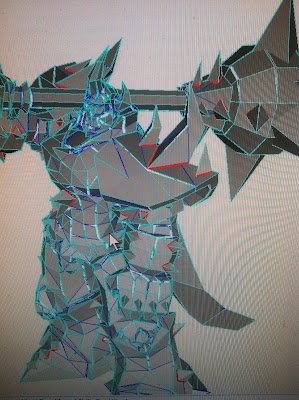
It took a bit of research but I finally got a 3D model of
Mordekaiser loaded into Pepakura. This is great as I can rotate it around and
take measurements. Also did a far amount of taking screen shots and printing
those and tracing it onto foam. For League of legends characters you can find
the info on how to do this at http://leaguecraft.com/
and Pepakura at http://www.tamasoft.co.jp/pepakura-en/
So after getting a better look at the helm I did not like the shape so I blew out the sides again and made it true to form. Below is the final Helm and chest piece before the fiberglass.
This is the start of
the shoulder pads. I took measurements from the 3D model in Pepakura and cut it
out of cheap foam rubber.
Here is the helm after the first layer of fiberglass.
Some sanding and another layer went on.
Bondo!!! Fun times. I learned what not to do here. I should have put it on thick and just sanded it smooth. I did layers and did not wipe it clean so as I sanded I would hit pockets of dust. It doubled the amount of work to get it smooth.
Here is a picture of the chest with 2 layer of fiberglass, the helm ready to paint and the shoulders getting ready for fiberglass. The shoulders spikes are made out of the dense blue foam you get at Lowes and covered with masking tape so the fiberglass resin does not melt them.
Shoulders with 1 layer of fiberglass and the helm with 1 coat of primer in the background.
The primer showed off the imperfections in the helm so I used some Bondo Glazing and Spotting Putty I got at Wal-Mart to fill in the imperfections. I sanded it down with 100-600 grit sandpaper. http://www.walmart.com/ip/Bondo-Glazing-and-Spotting-Putty-4.5-oz/16927984
The helm painted. I used hammered silver by Rust-oleum. http://www.pacoa.com/rust-oleum-72138-silver-hammer-finish.html Then a friend brushed on watered down black acrylic paint and then let it dry awhile but not all the way. Then wiped off what he could with a dry towel. This made it look metal and I was really happy with how it came out.
The Morde helm has a whole construction helmet inside of it with a motorcycle face shield attached I got off Amazon. The eyes are trailer tail light covers I got at NAPA with 2 red LED's I got at radio shack.
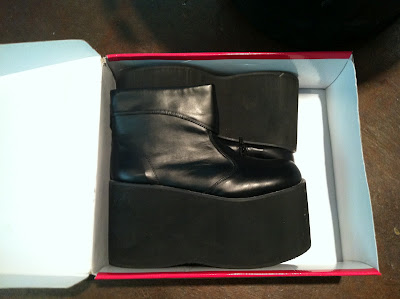
So I'm 6'4 and Morde
is 8 feet tall. To get there I got shoes with a 5" lift and made the helm
sit 3" off my head with a 1 foot spike on top of that.
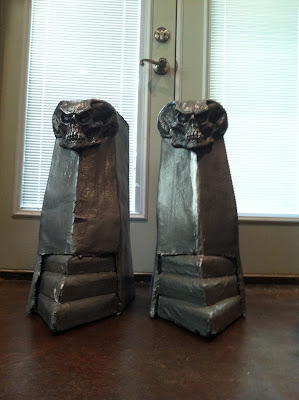
The boots I did in one day. Made the bottom 8" out of the dense blue foam cut the side walls out of foam rubber. Layer of masking tape over everything and then 3M spray adhesive and a layer of thin cotton cloth. Then 2 coats of fiberglass resin. Fiberglass cloth is tougher but much harder to work with. The boots just needed a light sand and added some plastic skulls I found at Party City http://www.partycity.com/?kwid=&gclid=CLyAs86QrLICFcKDQgodVk4ANQ and painted them.
So I finally got the
gauntlets made out of metal done. Not counting the thumbs the fingers are 48 seperate pieces.
I added eleven 9" spikes made from blue foam covered everything in masking tape. Wrapped all that in a cotton bed sheet held on with staples. I should have used the 3M adhesive. 2 coats of resin plus a 8 foot 2" PVC pipe and I had my Mace of Spades
Here is the first time I put on the chest shoulders and helm. The cape is faux leather I got at Joann's. The abs detail is tag board cut and glued onto the chest piece using 3M spray adhesive.
I did 90% of the work in 6 weeks. I would say I have about 300 hours into the costume in that time. I have at least 100 hours in planning before that. In the end all worth it
Subscribe to:
Posts (Atom)


